
dometic rv ac unit manual
Welcome to our guide on Dometic RV AC units! Dometic is a trusted brand in the RV industry, offering high-quality air conditioning systems designed for recreational vehicles. These units provide efficient cooling and heating, ensuring comfort on the go. Whether you’re a seasoned RVer or a newcomer, understanding your Dometic AC unit is essential for optimal performance and maintenance. This guide will walk you through installation, maintenance, troubleshooting, and more, helping you make the most of your Dometic RV AC.
Overview of Dometic RV Air Conditioning Systems
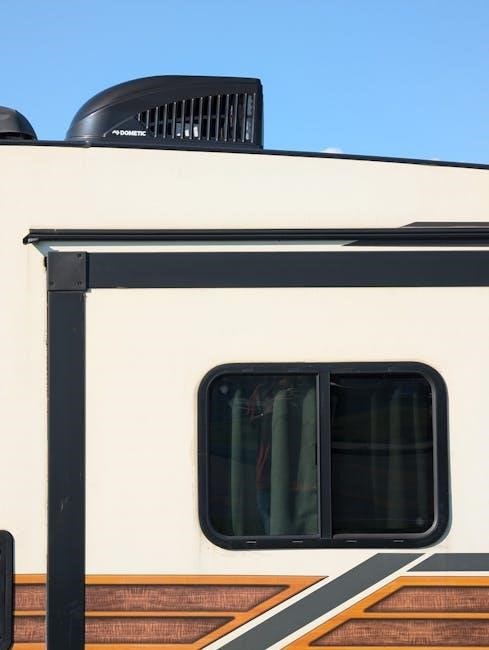
Dometic RV air conditioning systems are designed to provide reliable cooling and heating for recreational vehicles. These units are engineered to withstand the rigors of travel, ensuring comfort in diverse climates. Known for their efficiency and durability, Dometic AC systems are popular among RVers. Models like the Penguin II offer a low-profile design, reducing wind resistance while delivering powerful cooling. These systems are designed to integrate seamlessly with RV interiors, offering user-friendly controls and smart features. Whether you’re camping in extreme heat or need consistent temperatures, Dometic AC units are built to meet the unique demands of life on the road, ensuring a comfortable and enjoyable experience.
Installation and Setup
Installing a Dometic RV AC unit requires careful preparation and adherence to safety guidelines. Ensure the RV is on level ground, power is off, and the unit is properly positioned on the roof. Secure the AC unit firmly and connect electrical and ductwork connections. Always follow the manufacturer’s instructions for a safe and successful installation. Proper setup ensures efficient cooling and prevents potential damage to the system.
Preparation Steps for Installing a Dometic RV AC Unit
Before installing your Dometic RV AC unit, ensure you have all necessary tools and materials. Verify the RV’s roof dimensions match the AC unit’s specifications. Turn off the RV’s power supply and engage the parking brake for safety. Inspect the roof for any obstructions or damage. Measure and mark the installation area accurately. Apply a layer of roof sealant around the opening to prevent leaks. Ensure the AC unit is properly aligned with the roof opening. Secure the unit firmly to avoid vibration damage during travel. Follow the manufacturer’s manual for precise installation instructions. Proper preparation ensures a safe and efficient installation process.
Detailed Installation Guide for Dometic RV AC Units
Begin by positioning the Dometic RV AC unit over the pre-cut roof opening, aligning the unit’s corners with the roof’s square hole. Secure the unit using the provided mounting hardware, ensuring it is tightly fastened to prevent vibration damage. Next, connect the electrical components, including the thermostat and power supply, following the manufacturer’s manual. Install the drain kit to direct condensation away from the RV. Apply insulation around the unit to minimize heat loss and reduce noise. Finally, test the AC by turning it on and checking for proper airflow and cooling performance. Refer to the manual for specific wiring diagrams and installation details to ensure a safe and efficient setup.
Post-Installation Checks and Tests
After installing your Dometic RV AC unit, perform thorough checks to ensure proper function and safety. First, verify that the power supply is stable and the unit is receiving the correct voltage. Inspect all electrical connections for tightness and ensure no wires are loose or damaged. Check for any signs of water leaks around the unit and drain kit. Test the AC by running it through all modes (cooling, heating, fan) to ensure proper airflow and temperature regulation. Listen for unusual noises or vibrations, which could indicate improper installation. Finally, review the manual to confirm all steps were followed correctly and no safety precautions were overlooked. This ensures your Dometic RV AC operates efficiently and safely.
Maintenance and Upkeep
Regularly clean the air filter, check for refrigerant leaks, and ensure proper drainage to maintain your Dometic RV AC unit’s efficiency. Refer to the manual for detailed maintenance schedules and procedures to keep your unit running smoothly and prolong its lifespan.
Regular Maintenance Tasks for Dometic RV AC Units
Regular maintenance is crucial to ensure your Dometic RV AC unit operates efficiently. Start by cleaning or replacing the air filter to improve airflow and reduce strain on the system. Check the refrigerant lines for leaks and ensure proper insulation. Inspect the condenser coils for dirt and debris, as blockages can reduce cooling performance. Drain the condensate water regularly to prevent mold and mildew buildup. Additionally, inspect the roof seals and gaskets for any signs of wear or damage. Always refer to your Dometic RV AC unit manual for specific maintenance schedules and procedures. Addressing these tasks regularly will extend the lifespan of your unit and maintain optimal performance.
Seasonal Maintenance and Preparation
Seasonal maintenance for your Dometic RV AC unit is essential to ensure optimal performance and longevity. Before storing your RV for the off-season, clean the air filter, drain condensate water, and inspect for leaks. Cover the unit to protect it from debris and harsh weather. In freezing temperatures, winterize the system to prevent damage from ice buildup. Check seals and gaskets for integrity and apply protective covers to exposed components. Refer to your Dometic RV AC unit manual for specific winterization procedures. Proper preparation ensures your AC is ready for the next adventure, maintaining efficiency and comfort year-round.
Troubleshooting Common Issues
Troubleshooting your Dometic RV AC unit starts with checking power supply and fuses. Ensure the thermostat is set correctly and filters are clean. If issues persist, consult your manual for error codes and solutions. Addressing problems early prevents further damage and ensures reliable cooling performance.
Why Your Dometic RV AC Unit Might Not Be Blowing Cold Air

If your Dometic RV AC unit isn’t blowing cold air, several factors could be at play. A blown fuse or tripped circuit breaker might be preventing the unit from receiving power. Additionally, if the thermostat is set too low, the compressor may overwork and shut down, causing the fan to run without cooling. Refrigerant leaks or low refrigerant levels can also prevent proper cooling. Inspect filters and vents for blockages, as poor airflow can reduce efficiency. Electrical issues, such as a faulty compressor or capacitor, might require professional attention. Always consult your manual for troubleshooting steps and ensure proper maintenance to resolve the issue effectively.
Understanding and Addressing Error Codes
Dometic RV AC units often display error codes to indicate specific issues. Codes like E1 or E2 typically relate to sensor malfunctions or communication problems between components. Always refer to your manual for a detailed list of codes and their meanings. To address these issues, start by checking the unit’s power supply and ensuring all connections are secure. If the error persists, restart the system or reset the unit. For complex codes, consult a certified technician to avoid further damage. Regular maintenance, such as cleaning sensors and updating software, can prevent errors. Remember, ignoring error codes may lead to system failure, so prompt action is essential to ensure your AC runs efficiently and safely.

Different Models and Features
Dometic offers various RV AC models, such as the Penguin II and Duo-Therm, each designed with unique features like low profiles, high-efficiency cooling, and advanced temperature control systems.
Popular Dometic RV AC Models and Their Features
Dometic offers a range of RV AC models, each tailored to meet specific needs. The Penguin II is a top choice, known for its low-profile design and high-efficiency cooling, making it ideal for aerodynamics. Another popular model is the Duo-Therm, which combines heating and cooling in one unit, ensuring year-round comfort. The Brisk II is also favored for its robust performance and quiet operation; Each model features advanced controls, energy-efficient designs, and durability to withstand the rigors of RV travel. Whether you prioritize space, energy savings, or powerful cooling, Dometic has a model to suit your lifestyle and RV setup.
How to Choose the Best Dometic RV AC Unit for Your Needs
Selecting the right Dometic RV AC unit involves considering several factors. First, assess your RV’s size and insulation to determine the required BTU capacity. If you travel frequently, a low-profile model like the Penguin II is ideal for reducing wind resistance. For those needing both heating and cooling, the Duo-Therm is a versatile option. Energy efficiency is another key consideration, with models like the Brisk II offering eco-friendly performance. Additionally, think about installation requirements and compatibility with your RV’s electrical system. By evaluating your lifestyle, travel habits, and RV specifications, you can choose a Dometic AC unit that perfectly balances performance, efficiency, and comfort for your adventures.

Safety Precautions
Always follow safety guidelines when handling your Dometic RV AC unit. Climbing on the RV roof for maintenance is hazardous and should be done by a certified technician. Ensure proper installation and adhere to the manual’s instructions to avoid accidents and ensure safe operation.
Important Safety Tips for Installing and Operating Dometic RV AC Units
Installing and operating a Dometic RV AC unit requires careful attention to safety to avoid accidents and ensure proper functionality. Always read and follow the manual’s instructions before starting any installation or maintenance task. Climbing on the RV roof to work on the AC unit is inherently dangerous and should only be performed by a qualified technician. Ensure the unit is properly secured to the roof to prevent it from shifting or falling. Avoid overloading electrical systems, as this can lead to fire hazards. Never modify the unit or bypass safety features. Keep the area around the AC unit clear of obstructions and ensure proper ventilation. Regularly inspect the unit for damage or wear. If unsure about any step, consult a certified professional to avoid risks.