
project repat instructions
Project Repat Instructions: A Comprehensive Guide
Project Repat expertly transforms cherished t-shirts into beautiful, lasting quilts, offering detailed instructions and support for both DIY enthusiasts and those seeking professional services.
This comprehensive guide details every stage, from initial t-shirt preparation to the final, heartwarming presentation of your unique memory keepsake.
What is Project Repat?
Project Repat emerged from a simple, yet impactful realization: a growing pile of unused t-shirts presented a significant waste problem. Founded in 2016 by Ross Lohr, the Cambridge, Massachusetts-based company initially sought a solution to its own textile waste.
However, it quickly evolved into a mission to repurpose sentimental clothing – primarily t-shirts – into high-quality, custom quilts. Project Repat doesn’t just create quilts; it preserves memories, transforming beloved shirts into tangible keepsakes.
The company aims to provide both a service for individuals wanting to immortalize their collections and to create textile jobs, offering both DIY guidance and fully commissioned quilt creation options. They offer accessible tutorials and dedicated customer support.
The Problem of T-Shirt Waste
The fashion industry, and specifically the production and disposal of apparel like t-shirts, contributes significantly to global textile waste. Millions of t-shirts end up in landfills annually, representing a substantial environmental burden due to the materials and resources used in their creation.
Beyond the environmental impact, many t-shirts hold sentimental value – representing events, memories, and personal experiences. Simply discarding these items feels wasteful, yet finding alternative uses can be challenging.
Project Repat directly addresses this issue by offering a sustainable solution: transforming these often-discarded t-shirts into cherished quilts, diverting them from landfills and giving them a new life. This approach minimizes waste while preserving valuable memories, offering a responsible alternative to disposal.
Project Repat’s Mission & Values
Project Repat’s core mission is to transform sentimental t-shirts into high-quality quilts, preserving memories and reducing textile waste. Founded in 2016, the company strives to provide a sustainable and meaningful alternative to discarding cherished clothing items.
Central to their values is a commitment to creating textile jobs, initially focusing on regions impacted by apparel manufacturing shifts. They prioritize ethical production practices and aim to empower communities through employment opportunities.
Furthermore, Project Repat values customer satisfaction, offering both DIY quilt kits and fully commissioned services to cater to diverse needs and skill levels. They emphasize quality craftsmanship, personalized service, and a dedication to turning personal stories into lasting heirlooms.
Getting Started with Your Project Repat Quilt
Project Repat simplifies quilt creation with easy ordering, size selection, and backing fabric choices, ensuring a personalized and stress-free experience for every customer.
Ordering Your Quilt
Project Repat’s online ordering process is designed for simplicity and clarity. Begin by selecting the desired quilt size, carefully considering the number of t-shirts you wish to incorporate. The website provides guidance on approximate t-shirt counts for each size, ensuring a well-balanced and visually appealing quilt.

Next, you’ll choose your preferred backing fabric – options range from cozy flannels to durable cottons, allowing you to customize the quilt’s feel and aesthetic. Clearly indicate the number of shirts you are sending, and any special instructions or design preferences you may have.
Once your order is placed, you’ll receive a confirmation email with detailed shipping instructions and a unique order number. Carefully package your t-shirts, ensuring they are clean and dry, and ship them to Project Repat’s facility. The team will then begin the process of transforming your treasured shirts into a beautiful, lasting quilt!

Quilt Size and T-Shirt Count
Project Repat offers a variety of quilt sizes to accommodate different needs and t-shirt collections. Smaller quilts, ideal for baby or lap throws, typically require around 12-18 t-shirts. Twin-sized quilts generally utilize 20-30 shirts, providing ample coverage for a single person.
For larger sizes like Full/Queen, expect to need approximately 30-45 t-shirts to achieve a visually full and balanced design. King-sized quilts, the most expansive option, often require 45-60+ shirts. It’s crucial to remember these are estimates; the size and design of the t-shirt graphics can influence the final count.
Project Repat recommends sending a few extra shirts to allow for design flexibility and potential unusable shirts. They expertly manage the layout, ensuring each shirt is showcased effectively within the chosen quilt size.
Choosing the Right Backing Fabric
Project Repat understands the importance of a quality backing fabric for your t-shirt quilt. The backing provides structural support, enhances warmth, and contributes to the overall aesthetic. They offer a curated selection of fabrics, including premium cotton flannel and durable cotton blends.
Flannel provides a cozy, soft feel, perfect for quilts intended for warmth and comfort. Cotton blends offer increased durability and resistance to wear and tear, ideal for quilts that will see frequent use. Consider the quilt’s intended purpose and recipient when making your selection.
Project Repat provides detailed descriptions and images of each fabric option, allowing you to visualize how it will complement your t-shirt designs. Choosing a coordinating or contrasting color can further personalize your quilt.

Preparing Your T-Shirts
Project Repat emphasizes proper t-shirt preparation for optimal quilt results; washing and ironing are crucial steps to ensure fabric stability and a polished final product.
Washing and Ironing Instructions
Before sending your t-shirts to Project Repat, or beginning a DIY quilt, thoroughly wash all shirts. This removes any sizing, oils, or dirt that could interfere with the quilting process and ensure vibrant colors remain intact. Use cold water and a mild detergent, avoiding bleach or fabric softeners.
After washing, tumble dry on low heat or hang to dry completely. Once dry, ironing is essential! Iron each t-shirt to remove wrinkles, creating a flat surface for accurate cutting and sewing. Pay close attention to the graphic areas, using a medium heat setting and ironing on the reverse side to protect the design. A well-ironed shirt will significantly improve the quilt’s overall appearance and make the cutting process much easier. Remember, a little preparation goes a long way towards a beautiful, lasting quilt!
T-Shirt Selection Guidelines
When choosing t-shirts for your Project Repat quilt, consider the variety of designs and colors to create a visually appealing layout. Shirts with meaningful graphics – event tees, travel souvenirs, or band shirts – work wonderfully. However, avoid shirts with excessively faded or cracked designs, as these may not translate well into the quilt.
Think about the overall aesthetic you desire. A mix of solid colors and graphics often creates a balanced look. Shirts with large, bold designs can be focal points, while smaller graphics add detail. It’s also helpful to consider the weight of the fabric; consistently weighted shirts will yield a more uniform quilt. Carefully curate your selection to ensure a quilt that truly reflects your cherished memories!
Acceptable T-Shirt Types
Project Repat generally accepts standard cotton or cotton-blend t-shirts, which provide the best results for quilt construction. Most common t-shirt materials, like those found in event shirts, promotional items, or retail purchases, are perfectly suitable. However, shirts with excessive stretching or significant wear may not hold their shape as well during the quilting process.
Avoid submitting shirts made from materials like silk, lace, or heavily textured fabrics, as these can be difficult to work with and may compromise the quilt’s integrity. Performance fabrics or moisture-wicking materials are also not recommended. The ideal t-shirt is a classic, comfortable cotton tee that holds sentimental value and is in reasonably good condition for transformation!
The Eight-Step Quilt Creation Process
Project Repat streamlines quilt-making into eight manageable steps, ensuring a smooth journey from cherished t-shirt collection to a beautifully crafted, lasting memory keepsake.
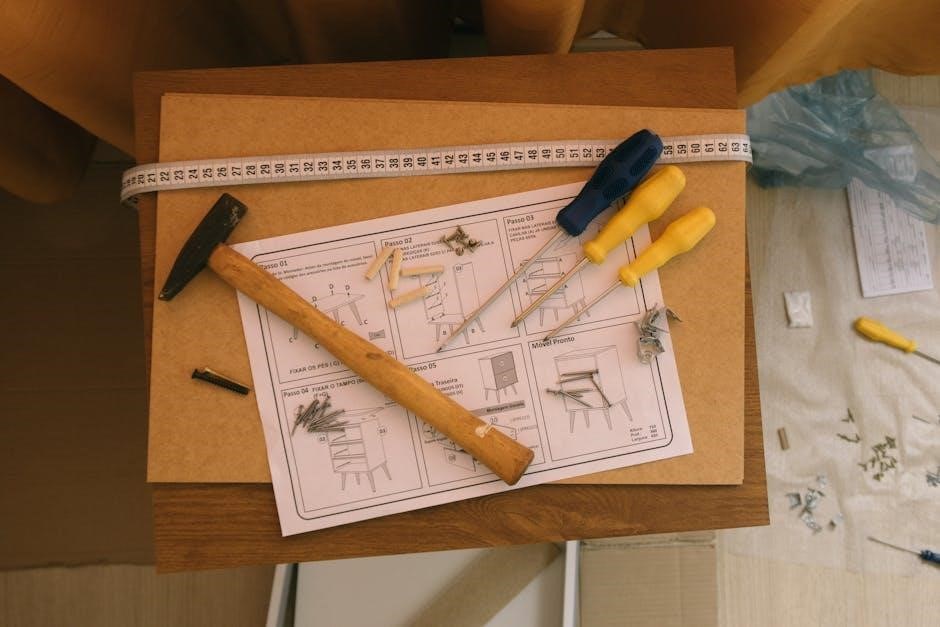
Step One: Gathering Shirts & Tools
Embarking on your Project Repat quilt journey begins with a thorough gathering of materials! First, carefully collect all the t-shirts destined for quilt-hood, ensuring you have the correct quantity based on your chosen quilt size. Remember to double-check the number of t-shirt sides selected during your order – this is crucial for a successful outcome.
Next, assemble your essential tools. While Project Repat provides the expertise and often some materials, you’ll need basic supplies like a large, flat workspace, scissors (fabric scissors are ideal!), a ruler or measuring tape, and potentially an iron and ironing board for preparing the shirts. Having everything readily available before you start will streamline the process and make it more enjoyable.
Consider a rotary cutter and cutting mat for precise cuts, though scissors work perfectly well too. Finally, ensure good lighting to accurately assess your t-shirts and plan your quilt’s design. Preparation is key to a fantastic finished product!
Step Two: T-Shirt Layout & Design
Now comes the creative fun – designing your quilt’s layout! Before cutting, carefully arrange your t-shirts on a large, flat surface. This is your chance to visualize the final product and strategically place your favorite designs. Consider the overall aesthetic you desire: a balanced mix, a thematic arrangement, or a completely random collage.
Think about the size and shape of the graphics on each shirt. Larger designs might require more square footage, while smaller logos can be grouped together. Experiment with different arrangements until you find a layout that pleases your eye. Don’t be afraid to take photos of various options to help you decide!
Remember to account for any shirts with sentimental value, ensuring they are prominently featured. This step is all about personalizing your quilt and creating a meaningful keepsake.
Step Three: Cutting the T-Shirts
Precise cutting is crucial for a professional-looking quilt; Using a rotary cutter, mat, and acrylic ruler (highly recommended!), carefully cut around your chosen designs. Ensure your cuts are square and consistent in size, matching the dimensions specified for your Project Repat quilt order. Accuracy at this stage significantly impacts the final quilt’s appearance.
If you’re not comfortable with a rotary cutter, sharp fabric scissors can be used, but require more precision and effort. Remember to cut slightly outside your desired shape, allowing for minor adjustments during the stabilizing process. Avoid stretching the fabric while cutting, as this can distort the design.
Once all shirts are cut, double-check that you have the correct number of squares for your chosen quilt size. A little extra time spent on careful cutting now will save you headaches later!
Step Four: Stabilizing the T-Shirt Squares
T-shirt fabric is inherently stretchy, making it challenging to sew accurately. Stabilizing the squares prevents distortion and ensures a flat, even quilt. Project Repat recommends using a lightweight, non-woven fusible interfacing. This adds structure without significantly altering the feel of the t-shirt material.
Cut the interfacing slightly smaller than each t-shirt square. Center the interfacing on the wrong side of the fabric and iron according to the interfacing manufacturer’s instructions. Use a pressing cloth to protect both your iron and the t-shirt design. Ensure the interfacing is fully adhered, paying particular attention to the edges.
Stabilizing each square individually before layout is most efficient. This step is vital for maintaining shape and preventing puckering during the sewing process, resulting in a high-quality finished quilt.
Step Five: Arranging the Layout
With stabilized squares prepared, the creative process of arranging the quilt layout begins! Lay out all your t-shirt squares on a large, flat surface – a floor or a design wall works well. Experiment with different arrangements, considering color, design, and sentimental value.
Think about creating visual balance and flow. You might group shirts by event, color scheme, or simply arrange them in a pleasing pattern. Take photos of various layouts to help you decide. Consider the overall aesthetic you want to achieve – symmetrical, random, or a specific design.
Once satisfied, carefully document the arrangement. This is crucial for maintaining the order when sewing the blocks together. A simple grid sketch or numbered photograph will serve as your guide throughout the quilting process.
Step Six: Sewing the Blocks Together
Following your documented layout, begin sewing the t-shirt blocks together in rows. Use a consistent seam allowance – typically ¼ inch – for accuracy. Pin the squares right sides together before sewing, ensuring precise alignment. Sew each row, pressing the seams open or to one side for a flatter finish.
Once all rows are complete, carefully pin the rows together, matching seams meticulously. Sew the rows together, again using a ¼ inch seam allowance. Press the entire quilt top, smoothing out any wrinkles or puckers. Accuracy in sewing and pressing is vital for a professional-looking quilt.
Double-check all seams for strength and consistency before proceeding to the next step. A well-sewn quilt top is the foundation for a beautiful and durable finished product.
Step Seven: Adding the Backing and Binding
With the quilt top complete, it’s time to layer it with batting and backing fabric. Lay the backing fabric right side down, then the batting on top, and finally, center the quilt top right side up. Baste the layers together using safety pins or basting spray, ensuring a smooth, wrinkle-free surface.
Next, apply the binding. Cut strips of fabric (typically 2.5 inches wide) and join them to create a continuous binding strip. Attach the binding to the quilt edge, mitering the corners for a clean finish. Hand-stitch or machine-stitch the binding to the back of the quilt, concealing the raw edges.
Carefully trim any excess batting or backing fabric. This step secures all layers and provides a polished, professional edge to your Project Repat quilt.
Step Eight: Final Touches & Quality Check
The final stage involves meticulous attention to detail. Carefully inspect the entire quilt for any loose threads, uneven stitching, or imperfections in the binding. Clip any stray threads and reinforce any weak seams. Gently press the quilt to smooth out any wrinkles and enhance its overall appearance.
Give the quilt a final wash, following the care instructions for the chosen fabrics. This will soften the quilt and ensure the colors remain vibrant. Once dry, give it one last thorough inspection, checking for any puckering or shifting of the layers.
Your Project Repat quilt is now complete – a beautiful, personalized keepsake ready to be cherished for years to come!

DIY vs. Commissioned Quilts
Choosing between a DIY t-shirt quilt and a professionally commissioned quilt from Project Repat depends on your skills, time, and desired level of finish.
Consider the pros and cons of each approach to determine the best fit for your project.
Pros and Cons of DIY T-Shirt Quilts
Embarking on a DIY t-shirt quilt journey offers significant creative control and a deeply personal touch, allowing you to meticulously arrange memories exactly as you envision them.
However, this path demands considerable time, patience, and sewing expertise; cutting accurately, stabilizing fabrics, and achieving a professional finish can be challenging for beginners.
The initial investment in tools – rotary cutters, cutting mats, rulers, and a sewing machine – can also be substantial. Mistakes are possible, potentially wasting precious t-shirt material.
Conversely, a DIY approach is often more cost-effective than commissioning, and the process itself can be incredibly rewarding. It’s a labor of love, imbued with personal significance. But be realistic about your skillset!
Ultimately, assess your sewing abilities and time commitment honestly before deciding if a DIY quilt is the right choice.
Benefits of Using Project Repat’s Services

Choosing Project Repat delivers a hassle-free experience, expertly transforming your t-shirts into a high-quality quilt without the demands of DIY. Their skilled artisans guarantee precise cutting, stabilization, and sewing, ensuring a professional finish.
Project Repat simplifies the process, handling everything from layout design to final quality checks, saving you valuable time and effort. They offer various backing fabric options and quilt sizes to perfectly match your preferences.
Furthermore, by utilizing their services, you support a company committed to creating textile jobs and minimizing textile waste – a socially responsible choice.
Their streamlined online ordering system and dedicated customer support provide peace of mind throughout the entire process. You receive a beautifully crafted heirloom, preserving memories with lasting quality.
Project Repat offers a convenient and reliable solution for creating a treasured keepsake.

Gifting a Project Repat Quilt
Project Repat quilts make incredibly thoughtful gifts, beautifully preserving cherished memories. Consider presentation ideas and their reusable canvas gift bag for an extra touch!
Presentation Ideas
Presenting a Project Repat quilt is an experience! Beyond the quilt itself, thoughtful presentation elevates the gift, amplifying its emotional impact. Consider the recipient’s personality and preferences when choosing how to unveil this treasured keepsake.
A simple, heartfelt presentation involves carefully wrapping the quilt with a ribbon and a handwritten card expressing the sentiment behind the gift. For a more dramatic reveal, host a small gathering of loved ones and unveil the quilt as a surprise.
Personalize the presentation further by incorporating photos or mementos related to the t-shirts used in the quilt. A scrapbook or photo album showcasing the memories associated with each shirt adds another layer of meaning. Don’t underestimate the power of a beautifully arranged display – perhaps draped over a favorite chair or showcased on a quilt rack.
Remember, the goal is to convey the love and thoughtfulness that went into creating this unique and lasting gift.
Reusable Canvas Gift Bag
Project Repat offers a sustainable and stylish solution for gifting your completed quilt: a durable, reusable canvas gift bag! This isn’t just packaging; it’s an extension of the quilt’s story, reflecting a commitment to reducing waste and cherishing memories.
The canvas bag is designed to protect your quilt during transport and storage, while also serving a practical purpose long after the initial presentation. It’s perfect for carrying groceries, books, or everyday essentials, ensuring the thoughtfulness of your gift continues to be appreciated.
The bag’s neutral color and simple design complement any quilt, and its sturdy construction guarantees years of use. It’s a beautiful and eco-friendly alternative to disposable wrapping paper, aligning with Project Repat’s values of sustainability and mindful consumption.
Choosing the canvas bag adds an extra touch of care and consideration to your heartfelt gift.

Project Repat Tutorials & Support
Project Repat provides extensive online tutorials and readily available customer support to guide you through every step, ensuring a smooth and enjoyable quilt-making experience.
Accessing Online Tutorials
Project Repat offers a wealth of accessible online tutorials designed to empower both novice and experienced quilters. These resources cover every aspect of the quilt creation process, from initial t-shirt preparation – washing, ironing, and selecting appropriate materials – to the intricacies of cutting, stabilizing, and sewing the t-shirt squares.
You’ll find detailed video demonstrations illustrating each step, ensuring clarity and ease of understanding. These tutorials break down complex techniques into manageable segments, making the process less daunting. Furthermore, Project Repat’s online platform provides guidance on layout design, arranging the blocks, and adding the backing and binding for a professional finish.
These tutorials are readily available on the Project Repat website and often shared through their social media channels, offering convenient access whenever you need assistance. They are designed to complement the written instructions and provide a visual learning experience, ultimately helping you create a cherished keepsake with confidence.
Contacting Customer Support
Project Repat prioritizes customer satisfaction and provides multiple avenues for support throughout your quilt journey. Should you encounter any questions or challenges, their dedicated customer support team is readily available to assist. You can reach them directly through the contact form on the Project Repat website, detailing your specific inquiry for a prompt response.
Alternatively, customers can connect with the support team via email, allowing for detailed explanations and potential image sharing to illustrate any issues. Project Repat also actively engages with customers on social media platforms, offering quick answers to frequently asked questions and providing guidance.
Their knowledgeable representatives are equipped to address concerns ranging from ordering and quilt size selection to troubleshooting technical difficulties during the DIY process. Project Repat strives to ensure a seamless and enjoyable experience for every customer, offering personalized assistance whenever needed.
Troubleshooting Common Issues
Project Repat understands that occasional hiccups can occur during the quilt-making process. A common issue is uneven t-shirt cutting; using a rotary cutter and ruler ensures precision. If stabilizer isn’t adhering correctly, ensure your iron is hot enough and applying consistent pressure. For layout challenges, revisit the design guidelines and consider rearranging blocks for visual balance.
Seam rippers are your friend! Don’t hesitate to correct mistakes – it’s part of the process. If backing fabric seems too small, double-check measurements against your quilt top. Difficulty with binding often stems from inconsistent seam allowances; practice on scrap fabric first.
Project Repat’s online tutorials offer visual solutions to many of these problems. Remember to utilize their customer support for personalized assistance if you’re truly stuck. Patience and attention to detail are key to a beautiful finished quilt!