
manual transmission oil change
Maintaining a manual transmission involves periodic oil changes, crucial for smooth shifting and longevity. Neglecting this service can lead to premature wear and costly repairs.
Proper lubrication ensures gears mesh correctly, reducing friction and heat, ultimately extending the life of your transmission components.
This guide will detail the process, helping you understand why, when, and how to change your manual transmission oil effectively.
Why Change Your Manual Transmission Oil?
Regularly changing your manual transmission oil is paramount for several reasons, directly impacting the health and performance of your vehicle. Over time, transmission fluid degrades due to heat, shear forces, and contamination from metal particles created by normal gear wear. This breakdown reduces its lubricating properties, increasing friction and wear on vital components like gears and bearings.
Old oil also loses its ability to effectively protect against corrosion and maintain proper temperature regulation. Ignoring oil changes can lead to difficulty shifting, noisy operation, and ultimately, catastrophic transmission failure – a significantly more expensive repair than routine maintenance. Using the correct gear oil, like GL-4 or GL-5, is vital, as specified by the manufacturer, to ensure optimal protection.
Furthermore, fresh oil helps maintain the integrity of seals, preventing leaks and ensuring consistent performance. Proactive maintenance saves money and extends the life of your transmission.
Tools and Materials Needed
Successfully completing a manual transmission oil change requires gathering specific tools and materials beforehand. You’ll need a wrench or socket set to fit the drain and fill plugs – sizes vary by vehicle, so consult your owner’s manual. A fluid pump is essential for efficiently filling the transmission, especially if the fill plug is hard to reach.
A drain pan is crucial for catching the old oil, and gloves will protect your hands. A funnel helps prevent spills during the filling process. Torque wrench is recommended to tighten the plugs to the manufacturer’s specification. Of course, you’ll need the correct type and quantity of manual transmission fluid – GL-4, GL-5, or MT-1 – based on your vehicle’s requirements.
Finally, have shop towels or rags available for cleanup and safety glasses to protect your eyes from splashes.

Identifying the Correct Transmission Oil
Selecting the right transmission oil is vital; GL-4, GL-5, and MT-1 fluids cater to different transmissions. Always verify compatibility with your vehicle’s specifications.
Using the incorrect oil can cause damage.
Understanding API Classifications: GL-4
GL-4 lubricants are specifically formulated for transmissions featuring spiral bevel or hypoid gears operating under light to moderately heavy conditions. These oils contain additives designed to protect these gear types from wear and scoring, ensuring smooth and reliable operation.
They generally do not contain extreme pressure (EP) additives found in GL-5 oils, which can sometimes be corrosive to the brass and copper components often present in older or non-synchronized manual transmissions.
Therefore, GL-4 is often the recommended choice for many older vehicles and those with transmissions explicitly requiring it. Using a GL-5 oil in a transmission designed for GL-4 can lead to premature component failure, highlighting the importance of adhering to manufacturer specifications. Always double-check your owner’s manual or consult a trusted mechanic.
Understanding API Classifications: GL-5
GL-5 gear oils are engineered for heavily loaded hypoid gears, commonly found in modern vehicles and those subjected to severe operating conditions. They boast a higher concentration of extreme pressure (EP) additives – sulfur-phosphorus compounds – providing superior protection against wear under intense stress.
However, this increased EP additive content can be detrimental to the brass and bronze components often utilized in older, non-synchronized manual transmissions. These materials can corrode when exposed to GL-5’s additives.
While GL-4 and GL-5 are the most prevalent in modern cars, it’s crucial to verify your vehicle’s requirements. Using GL-5 when GL-4 is specified can cause significant damage. Always prioritize the manufacturer’s recommendations to ensure optimal transmission health and longevity.
Understanding API Classifications: MT-1

MT-1 fluids represent a specialized classification designed for non-synchronized manual transmissions, frequently found in buses and heavy-duty trucks. These transmissions demand lubricants capable of handling unique stresses and operating conditions.
MT-1 oils are formulated to provide robust protection against temperature fluctuations, minimizing viscosity changes in extreme heat or cold. They also offer excellent resistance to component wear, extending the lifespan of gears and bearings.
Crucially, MT-1 fluids are engineered to be compatible with the oil seals prevalent in these older transmission designs, preventing leaks and maintaining optimal lubrication. When selecting a fluid, always consult your vehicle’s owner’s manual or a reliable resource to confirm the correct specification.
Viscosity and Climate Considerations
Selecting the correct viscosity for your manual transmission oil is paramount, heavily influenced by your local climate. Oil viscosity dictates how easily the fluid flows at different temperatures, impacting lubrication effectiveness.
In regions experiencing consistently cold weather, a lower-viscosity oil is generally recommended. This ensures adequate lubrication during cold starts when the oil is thicker. Conversely, hotter climates benefit from higher-viscosity oils, maintaining a protective film at elevated temperatures.
Ignoring these considerations can lead to increased wear, reduced fuel efficiency, and potential transmission damage. Always refer to your owner’s manual for the manufacturer’s recommended viscosity grade, tailored to your vehicle and operating environment.
Checking Your Owner’s Manual
Your vehicle’s owner’s manual is the definitive source for information regarding manual transmission oil changes. It specifies the exact type of fluid – including API classification (GL-4, GL-5, or MT-1) – and viscosity grade recommended by the manufacturer.
The manual will also detail the recommended service interval for oil changes, ensuring optimal transmission health. Ignoring these specifications can void your warranty and potentially cause significant damage.

Furthermore, the owner’s manual often provides diagrams illustrating the location of the drain and fill plugs, simplifying the oil change process. Always prioritize the manufacturer’s recommendations over general advice, guaranteeing compatibility and performance.

The Oil Change Process
Successfully changing your manual transmission oil involves locating drain/fill plugs, carefully draining the old fluid, and refilling with the correct type and amount of new oil.
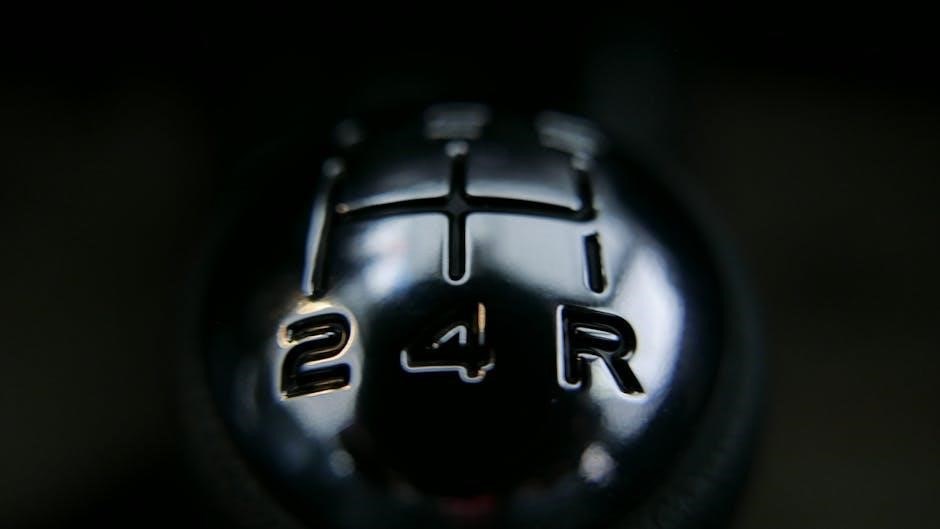
Locating the Drain and Fill Plugs
Identifying the drain and fill plugs is the first step. These are typically located on the side of the transmission case. The drain plug, usually at the bottom, resembles a bolt and will release the old oil when removed.
The fill plug is often positioned higher up and may be slightly different in size or shape. Carefully consult your vehicle’s repair manual or online resources for the exact location, as it varies significantly between makes and models.
Sometimes, these plugs can be difficult to spot due to their location or accumulated grime. A flashlight and a good set of sockets or wrenches are essential tools for this task. Remember to loosen the fill plug before draining the oil, ensuring you can refill the transmission once the old fluid is removed.
Draining the Old Oil
With the drain plug located, position a suitable drain pan beneath it to catch the used oil. Ensure the pan is large enough to hold the entire transmission fluid volume – typically between 2 to 4 quarts.
Using the correct size wrench, carefully loosen and remove the drain plug. Be prepared for the oil to flow out, and avoid contact as it may be hot. Allow the transmission to drain completely, which can take 20-30 minutes.
For a more complete drain, gently rock the vehicle or rotate the transmission housing if possible. Inspect the drained oil for metal shavings, which could indicate internal transmission wear. This is a crucial step in assessing the overall health of your transmission.
Inspecting the Drain Plug
Before reinstalling the drain plug, thoroughly inspect it for any damage to the threads. Stripped threads can lead to leaks and require costly repairs. Examine the plug’s sealing surface for wear or corrosion, which could compromise its ability to create a tight seal.
If the drain plug is equipped with a magnetic tip, carefully clean off any accumulated metal particles. These particles indicate internal wear within the transmission, offering valuable insight into its condition. Replace the drain plug if the threads are significantly damaged or the sealing surface is severely worn.
Consider replacing the drain plug washer (or crush washer) with a new one each time you change the oil. This ensures a fresh, reliable seal, preventing potential leaks and maintaining optimal fluid levels.
Filling with New Oil
With the drain plug securely tightened, locate the fill plug – often found on the side of the transmission. Carefully remove the fill plug, preparing to add the correct type and amount of manual transmission fluid as specified in your owner’s manual.
Using a fluid pump or funnel, slowly pour the new oil into the fill opening. Avoid overfilling, as this can cause pressure buildup and leaks. Fill gradually, periodically checking the fluid level to ensure it reaches the correct height.
Once the fluid level is appropriate, reinstall the fill plug and tighten it to the manufacturer’s specified torque. Double-check both the drain and fill plugs to confirm they are securely fastened, preventing any potential fluid loss.

Post-Change Checks and Maintenance
After refilling, verify the oil level and conduct a test drive, carefully inspecting for any leaks around the drain and fill plugs.
Regular inspections are vital for long-term transmission health and preventing future issues.
Checking the Oil Level
After completing the oil change and allowing the transmission fluid to settle, accurately checking the oil level is paramount. Locate the fill plug again – this often doubles as a level check point. With the vehicle on a level surface, and the engine off, remove the fill plug.
Insert a thin, flexible dipstick or wire into the fill hole. You’re aiming to feel resistance when the dipstick reaches the correct fluid level. The fluid should be level with the bottom of the fill hole. If it’s low, carefully add more of the specified transmission oil in small increments, rechecking after each addition.
Avoid overfilling, as this can cause pressure buildup and leaks. Remember, precise fluid levels are crucial for optimal transmission performance and longevity. Always refer to your vehicle’s owner’s manual for specific instructions.
Test Drive and Leak Inspection
Following the oil change, a thorough test drive is essential to verify proper operation. Start with gentle driving, gradually increasing speed and engaging all gears. Pay close attention to the shift quality – it should be smooth and precise, without any grinding or hesitation. Listen for any unusual noises emanating from the transmission;
Simultaneously, carefully inspect the drain and fill plugs for any signs of leakage. Place a drip pan under each plug during the test drive for added security. Check around the transmission housing itself for any oil residue.
Address any leaks immediately. A successful test drive and leak-free inspection confirm a properly executed manual transmission oil change, ensuring optimal performance and reliability.

Common Issues and Troubleshooting
Encountering difficulty locating drain/fill plugs or stripped threads are frequent issues. Patience and the correct tools are vital for successful resolution and preventing damage.

Difficulty Locating Plugs
Locating the drain and fill plugs on a manual transmission can sometimes prove challenging, varying significantly between vehicle makes and models. These plugs aren’t always easily visible, often hidden behind undercarriage components like exhaust systems or driveshafts. A thorough visual inspection with a bright flashlight is the first step, carefully scanning the transmission housing.
Consulting a vehicle-specific repair manual or online resources with diagrams is highly recommended. These resources often provide precise locations for the plugs. If still struggling, consider checking online forums dedicated to your vehicle; other owners may have shared their experiences and offered helpful tips. Remember to ensure the vehicle is safely supported on jack stands before attempting any undercarriage work.
Sometimes, corrosion can obscure the plugs, making them harder to identify. A wire brush can help clean away any buildup.
Stripped Drain/Fill Plug Threads
Encountering stripped threads on the drain or fill plugs is a frustrating, yet common, issue during manual transmission oil changes. This typically happens due to over-tightening the plugs during previous installations, or using the incorrect size wrench. Once the threads are damaged, the plug may not seal properly, leading to leaks.
If you discover stripped threads, avoid forcing the plug, as this will worsen the damage. Several repair options exist, including using a thread repair kit (Helicoil) or tapping the hole to a larger size. A professional mechanic is often best suited for these repairs. Always use a torque wrench to tighten the plugs to the manufacturer’s specified torque to prevent future stripping.
Careful application of force and the correct tools are crucial to avoid this problem.
Recommended Oil Brands
Several reputable brands offer excellent manual transmission fluids, including Redline’s MT85 GL-4 and OEM fluids directly from dealerships, ensuring compatibility.
Choosing a trusted brand guarantees quality and proper protection for your transmission’s internal components.
Redline Manual Transmission Fluid MT85 GL-4
Redline MT85 GL-4 is a highly regarded synthetic manual transmission fluid, frequently recommended for specific applications, particularly those requiring a GL-4 specification.
Its formulation focuses on providing exceptional shear stability, maintaining viscosity under stress, and offering superior protection against wear for gears and synchronizers.
Many automotive enthusiasts and professional mechanics advocate for Redline MT85 GL-4 due to its consistent performance and ability to improve shifting smoothness.
This fluid is especially beneficial in transmissions prone to notching or difficult engagement, as it helps reduce friction and enhance gear synchronization.
Users have reported positive experiences, noting smoother shifts and quieter operation after switching to Redline MT85 GL-4, making it a popular choice for vehicle maintenance.
It’s crucial to verify compatibility with your vehicle’s specifications before use, but it’s often a direct replacement for OEM fluids meeting the GL-4 standard.
OEM Transmission Fluids (Dealer Specific)
Utilizing Original Equipment Manufacturer (OEM) transmission fluids ensures compatibility and adherence to your vehicle’s specific engineering requirements.
Dealerships offer fluids formulated precisely for your make and model, guaranteeing optimal performance and potentially preserving your warranty.
While often more expensive than aftermarket options, OEM fluids are designed to work synergistically with the transmission’s internal components.
For some vehicles, particularly those with complex transmission designs, using the correct OEM fluid is non-negotiable to avoid damage.
A Hyundai owner, for example, reported a cost of only $6.99 per unit at their dealership, demonstrating potential affordability in certain cases.
Consulting your owner’s manual and verifying the correct part number with your dealer is crucial before purchasing any transmission fluid.

Long-Term Transmission Health
Consistent inspection and preventative maintenance, including regular oil changes, are vital for maximizing the lifespan and reliability of your manual transmission.
Adhering to a schedule helps identify potential issues early, preventing costly repairs and ensuring years of smooth operation.
Regular Inspection Schedule
Establishing a consistent inspection schedule is paramount for long-term transmission health. A visual check for leaks around the drain and fill plugs should be performed with every oil change.
Beyond the oil change, a more thorough inspection is recommended every 12,000 to 15,000 miles, or annually, whichever comes first. This includes carefully examining the oil itself for metal shavings, a sign of internal wear.
Pay attention to shifting quality; any unusual noises, stiffness, or difficulty selecting gears warrants immediate attention.
Consider a professional inspection every three years to assess the overall condition of the transmission and identify potential problems before they escalate. Keeping detailed records of all inspections and maintenance performed will also prove invaluable.
Preventative Maintenance Tips
Proactive maintenance extends transmission life significantly. Always use the manufacturer-recommended oil type – consulting your owner’s manual is crucial. Avoid aggressive shifting and “speed shifting,” as these put undue stress on gears.
Ensure the clutch is functioning correctly; a dragging clutch generates excessive heat, impacting the transmission oil. Regularly check and adjust clutch cable free play, if applicable.
When towing or driving in severe conditions, shorten oil change intervals. Avoid mixing different types of transmission fluids, as this can cause compatibility issues.
Promptly address any leaks or unusual noises. Consider a magnetic drain plug to capture metal particles, further protecting internal components from wear and tear.